Creating a Virtual Machine
Downloading Ubuntu Desktop
There are many versions of Linux (also known as distributions or distros) created and maintained by various developers.
That’s the great thing about Linux; without licensing restrictions, developers are free to create their own distributions to suit their needs and preferences.
In this example, we will be using Ubuntu for its beginner friendly design.
Go to https://ubuntu.com/download/desktop and download the latest LTS version. A ‘Disk Image File’ (with extension .iso) will be downloaded to your PC.

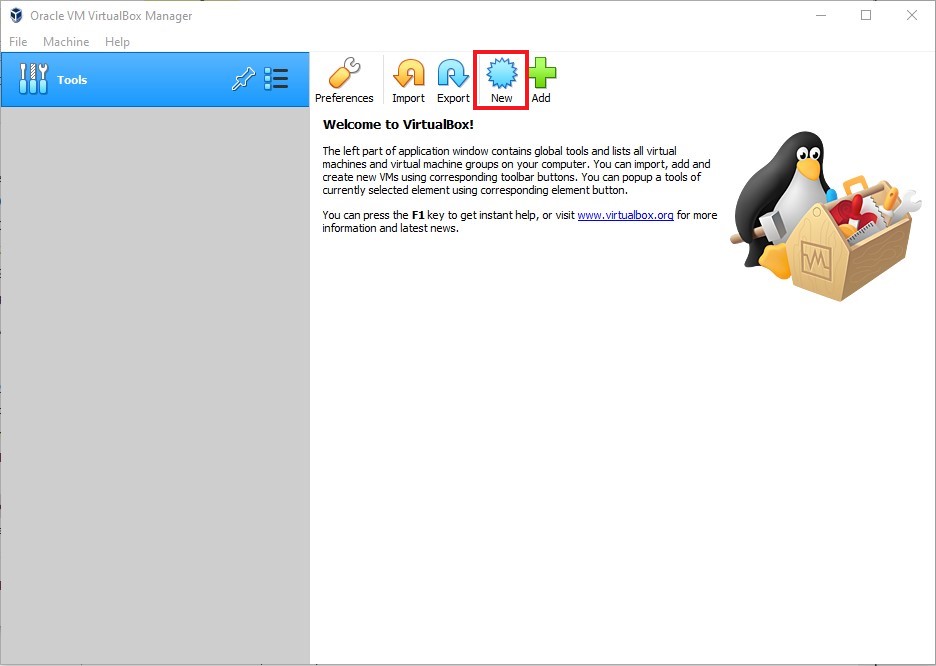
Now that you have your hypervisor and Linux operating system, it’s time to create a virtual machine. Open virtual box and Select “New”.
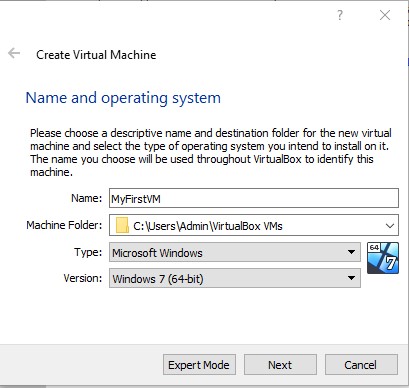
Type in a name for your virtual machine and select the folder you want the machine to be in.
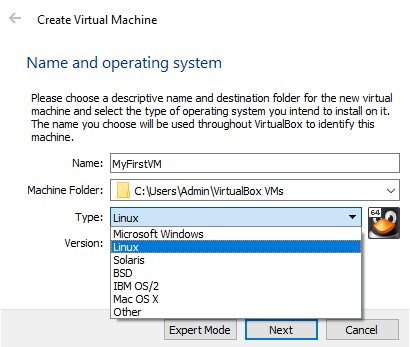
For type, click on the drop-down tab and select “Linux”.
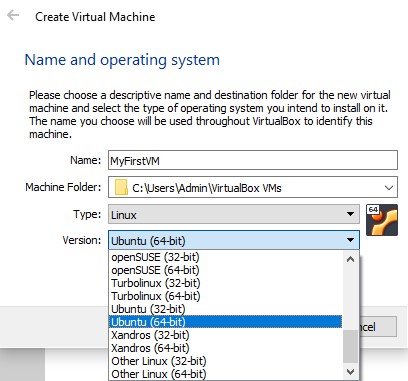
For version, click on the drop-down tab and select “Ubuntu (64-bit)” and then click on “Next”.
The next page will ask you to select the amount of RAM you want for your virtual machine. Because Linux does not use as much resources as Windows, it does not need much. When working with virtual machines, you should never use more than half of your host’s memory. For Linux, 2GB works perfectly fine. Move the memory slider to 2048MB in the box and then hit “Next.”
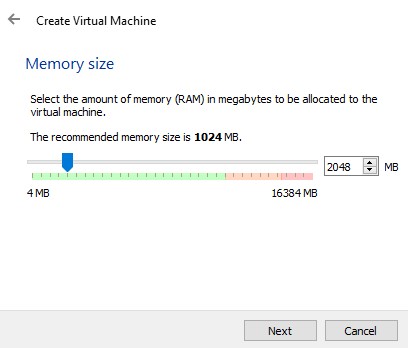
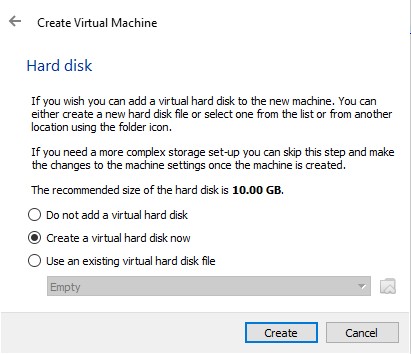
Select “Create a virtual hard disk now” and then click “Create”.
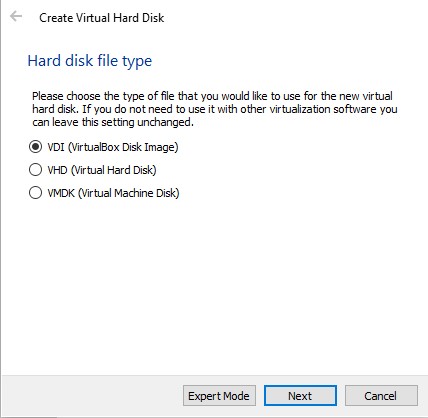
Select “VDI” and then “Next”.
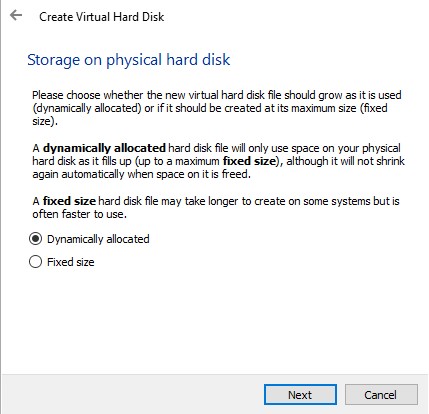
Select “Dynamically allocated” and then “Next”.
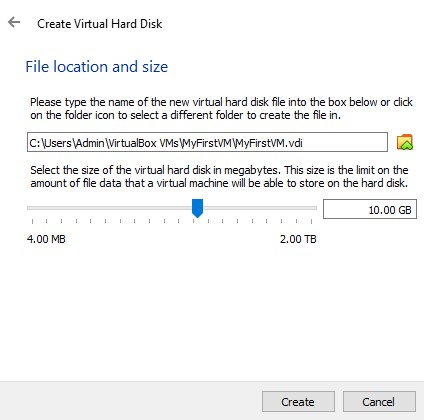
Choose a folder you want your VM disk to be in. The next setting asks how much storage you want to allocate to your VM. The recommended 10GB should be enough. Click ”Create”.
You have now created your virtual machine. Now, you’ll have to add the operating system into the virtual machine. Click on your virtual machine that’s located on the right and then click on “Settings”. This will show you all the information about your virtual machine and allow you to configurate it to your liking.


Click on “Systems” -> “Processor” and increase your CPU processors.

Then, click on “Storage” -> “Empty.” On the right side, where it says, “Optical Drive”, click on the disk icon and click “Choose Virtual Optical Disk File…”

Click on the “Add” icon, locate your Ubuntu iso file, and click “Open”

Choose the file and then click “OK” to close the settings window.

To be sure the file has been added, check the storage information, and make sure your .iso file is listed.
 < Last Lesson
Next Lesson >